If you’re looking to enhance your outdoor space without the hassle of regular lawn maintenance, DIY artificial turf installation might be the perfect solution for you. In Georgia, where hot summers and unpredictable weather can take a toll on natural grass, artificial turf offers a low-maintenance, evergreen alternative. Whether you’re aiming to create a lush lawn for your backyard, patio, or play area, installing artificial turf can be a rewarding project. In this blog post, BlackRock Landscape & Construction helps walk you through everything you need to know to get your turf looking great and lasting for years to come!
Understanding Artificial Turf: Why Choose It?
Before diving into the installation process, it’s important to understand why artificial turf is such a great choice for homeowners in Georgia. Georgia’s warm climate, combined with the frequent summer droughts, can make maintaining a natural grass lawn challenging. Artificial turf eliminates the need for frequent watering, mowing, and fertilizing, which not only saves you time but also reduces water consumption. Moreover, synthetic grass is durable and can withstand heavy foot traffic, making it ideal for families, pets, and outdoor events. Once installed, it maintains its vibrant green color and texture, requiring little upkeep other than occasional cleaning.
Artificial turf is a durable, low-maintenance alternative to natural grass, perfect for homeowners and businesses looking to enhance outdoor spaces. Unlike real grass, artificial turf stays lush and green year-round, requiring no watering, mowing, or fertilizing. It’s ideal for high-traffic areas, sports fields, and playgrounds, offering superior durability and safety. Additionally, it saves water and reduces landscaping costs, making it an eco-friendly option. Choosing professional artificial turf services ensures proper installation, maximizing its lifespan and performance. Transform your outdoor space with a hassle-free, long-lasting turf solution tailored to your needs.
Gathering Your Materials and Tools
Once you’ve planned the layout and chosen the right turf, the next step is gathering the necessary materials and tools. For a typical DIY artificial turf installation, you’ll need the following:
- Artificial turf (ensure you have enough for your area)
- Turf adhesive or tape
- Weed barrier fabric
- Crushed stone or decomposed granite for the base
- Sand for leveling
- Landscape staples or nails
- A utility knife for cutting the turf
- A shovel and rake
- A compactor or hand tamper
- A power broom (optional, for brushing the fibers)
These materials can typically be purchased at home improvement stores or online. Be sure to select high-quality artificial turf to ensure long-lasting results.
Planning Your Artificial Turf Installation
The first step in any DIY project is careful planning. Take the time to measure the area where you want to install artificial turf. Whether it’s a small backyard, a front yard, or even a rooftop garden, accurate measurements will ensure that you purchase enough turf for your project. You’ll also need to consider the layout of your space. Think about any obstacles, such as trees, flower beds, or pathways, and how you’ll work around them. It’s also essential to choose the right type of artificial turf for your needs. There are different types designed for specific purposes, such as residential lawns, sports fields, or pet-friendly yards.
Installing artificial turf is a transformative way to enhance your outdoor spaces with a low-maintenance, evergreen look. Start by assessing the area to ensure it’s suitable for turf installation and free from drainage issues. Proper planning includes measuring the space accurately, selecting high-quality turf, and determining the best time for installation. Whether it’s for a backyard, sports field, or commercial property, a well-thought-out plan ensures a seamless process and a durable, visually appealing result.
In Gwinnett, you can take your artificial turf project to the next level by incorporating custom patterns and designs. From unique layouts to artistic accents, customized turf adds a personal touch and makes your space stand out. Explore creative possibilities to make your turf truly unique!
Preparing the Ground for Installation
Proper ground preparation is crucial for a successful artificial turf installation. The first step is to remove any existing grass, weeds, or debris from the area. Use a shovel or garden rake to clear the space, and ensure that you dig out any old grass and roots, as they could interfere with the turf’s stability.
Once the area is clear, the next step is to level the ground. This involves removing any bumps or low spots to create a smooth, even surface. For best results, you’ll want to dig about 2-3 inches deep to create enough space for the base material. After leveling the ground, lay down a weed barrier fabric to prevent weeds from growing through your turf. This is especially important in Georgia’s climate, where invasive plants can grow rapidly.
Laying the Base Material
The base material serves as the foundation for your artificial turf, providing drainage and stability. Typically, crushed stone or decomposed granite is used for this purpose. Spread a 2-3 inch layer of base material evenly across the area. Once the material is in place, use a rake to level it out, and then compact it using a hand tamper or mechanical compactor. Proper compaction is essential to prevent the base from shifting over time, which could lead to uneven turf surfaces.
After the base is compacted, spread a thin layer of sand over it to help with leveling. This sand layer will further smooth the surface and create a cushion for the artificial turf. Use a rake to evenly distribute the sand, and once again, make sure everything is level.
Cutting and Fitting the Turf
Now comes the fun part: laying down the artificial turf. Unroll your artificial turf across the prepared area, making sure it fits properly without any wrinkles or gaps. When cutting the turf to fit around edges or obstacles, use a utility knife to make precise cuts. Take your time with this step to ensure the turf lines up well with the contours of your yard. If your installation requires multiple rolls of turf, make sure the seams match up seamlessly for a more natural look.
As you lay down the turf, be sure to leave a small gap (about 1-2 inches) along the edges of the installation area. This will allow the turf to expand slightly with changes in temperature and prevent it from becoming too tight.
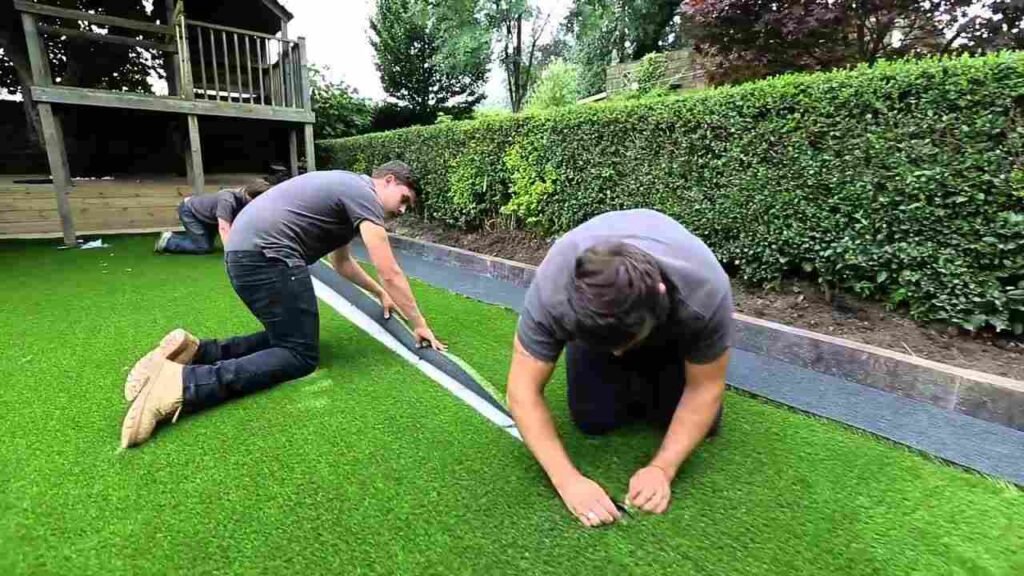
Securing the Turf in Place
Once the turf is cut and laid out, it’s time to secure it in place. Start by fastening the edges of the turf with landscape staples or nails. These should be spaced about 6 inches apart to ensure that the turf stays securely in place. Make sure the staples are driven into the ground and not just the turf itself, as this will keep the turf from shifting.
If you have seams where two pieces of turf meet, use turf adhesive or turf tape to bond the edges together. Turf tape is a quick and effective solution for securing seams, while adhesive provides a more permanent bond. Press the seams firmly together and make sure they are smooth and flat.
Adding the Final Touches
With the turf secured, you can now add the finishing touches. Use a power broom (or a regular broom if you don’t have one) to brush the fibers of the turf upright. This helps to give the turf a more natural look by making the fibers stand tall and creating a realistic texture. If your turf has infill (such as sand or rubber granules), spread it evenly across the surface. Infill helps to weight down the turf, keep the fibers upright, and provide additional cushioning underfoot.
You may also want to water down the turf to settle the infill and give it a more natural look. Use a garden hose to lightly spray the surface, ensuring that the infill is properly distributed.
Maintenance and Care for Your Artificial Turf
Although artificial turf requires much less maintenance than natural grass, it’s not completely maintenance-free. Regular care will help keep it looking great for years to come. Occasional cleaning is necessary to remove debris, such as leaves, dirt, and pet waste. Use a leaf blower or broom to clear the surface, and wash the turf with water if necessary. For pet owners, make sure to clean up any messes promptly to prevent odors.
Maintaining artificial turf is essential for keeping it looking fresh and functional for years. Regular cleaning, such as removing debris, brushing the turf, and rinsing it with water, helps prevent dirt buildup and keeps the fibers standing upright. Additionally, addressing minor issues like flattening or worn spots can extend the lifespan of your turf. Proper maintenance also ensures a safe, aesthetically pleasing surface, whether for residential lawns, playgrounds, or sports fields.
For residents in Gwinnett, professional Artificial Turf Maintenance Services provide specialized care to ensure your turf remains in top condition. These services often include deep cleaning, repairs, and applying treatments to restore the turf’s vibrancy. Learn more about what to expect by contacting your local experts today.
FAQs
What goes underneath artificial turf?
Landscape fabric – A weed barrier cloth can prevent weeds from poking through your turf if they’re an issue. It will also keep the dirt and rock separated, maintaining a stable base for your artificial grass. Just overlap the fabric panels when you lay it down. Crushed rocks – I’m talking 3/4 to 1 1/2 inch gravel.
What to do before installing turf?
Loosen and Level the existing soil base and remove any stones or tree roots. If required add a sandy loam or sand topsoil to a depth of 60-100mm. Apply Lawn Starter fertiliser on the prepared surface prior to laying the turf. Lay the turf in a brick pattern ensuring that you push not pull the turf into position.
What goes down before turf?
Start preparing the area a few weeks before you plan to lay turf. The aim is to create a level surface with a light, crumbly soil texture and a layer of 100-150mm (4-6in) of good topsoil.
What goes underneath artificial turf?
Landscape fabric – A weed barrier cloth can prevent weeds from poking through your turf if they’re an issue. It will also keep the dirt and rock separated, maintaining a stable base for your artificial grass. Just overlap the fabric panels when you lay it down. Crushed rocks – I’m talking 3/4 to 1 1/2 inch gravel.
What is the proper way to install artificial turf?
- Prepare the area and materials.
- Excavation.
- Define the perimeter.
- Place a weedblock fabric.
- Base Installation.
- Compacting the base.
- Measuring, laying and setting the new artificial grass.
- Lay out the grass and trim the edges.
Conclusion
Installing artificial turf in Georgia is a great way to enjoy a beautiful, low-maintenance lawn year-round. By following these steps and taking your time with each part of the process, you can achieve a professional-looking result without the need to hire a contractor. Whether you’re creating a play area for your children, a pet-friendly yard, or simply want to eliminate the hassle of lawn care, DIY artificial turf installation is a rewarding project that will enhance your outdoor space and save you time and money in the long run. Happy installing!